Dear London,
Your grey skies and brick buildings welcomed us to city living. We landed here in 2011 and only meant to be your guest for a couple of years, to enrich our lives with your worldliness and history. Little did we know your beguiling ways would enchant us for a surprising ten years and we would become part of your family.
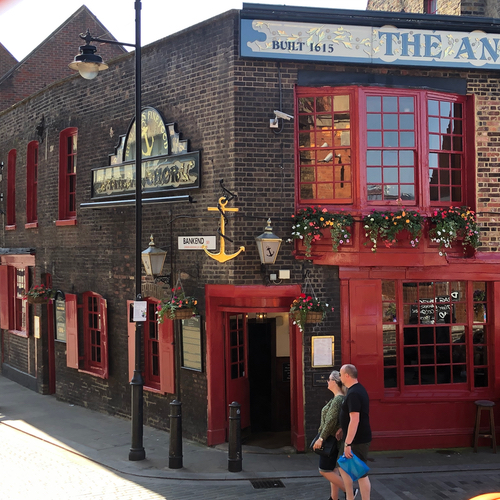
Pub on Bankside along the Thames2012 my youngest daughter (L) and youngest son (R) enjoy the interactive attractions at one of the many museums.
Thank you for sharing your people. Friends who have welcomed us into their hearts and homes. Diverse communities that have expanded my children’s minds and attitudes towards others. Hardy companions for my husband to stand out in all types of weather for a round of beer.
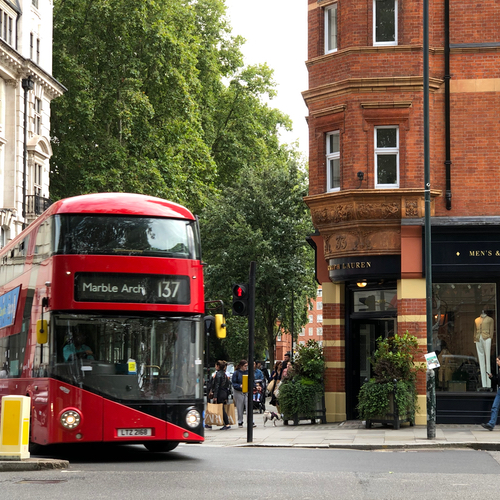
The 137 at Sloan Square2016 Eldest daughter wears a hat I made.
I appreciate, all the people who taught me to make hats within the context of a city and country were hats, history and craftsmanship are so intertwined that it is impossible to tease apart the individual fibres that create the most enchanting headwear.
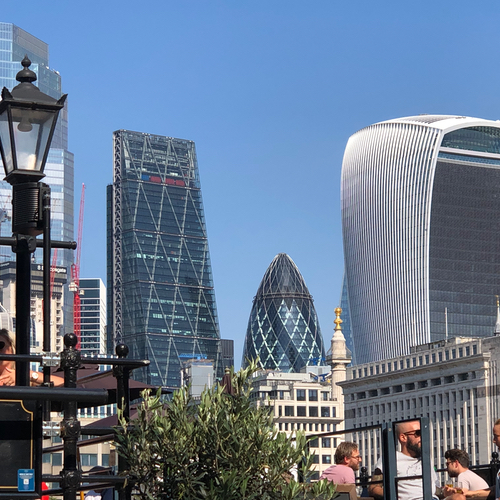
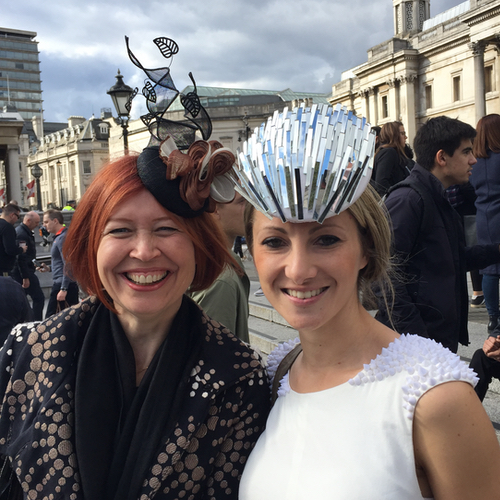
London Skyline 20212016 London Hat Week – Hat Walk with Elly Stemerdink and Ana Pribylova
London, you have changed our lives immeasurably for the better. I hope that in some small way that I have given back to you, my adopted city and country. I will strive to be an ambassador of craftsmanship and tolerance, by embracing uniqueness in people which makes their art and their communities special.
For all that you have given me, I am thankful.
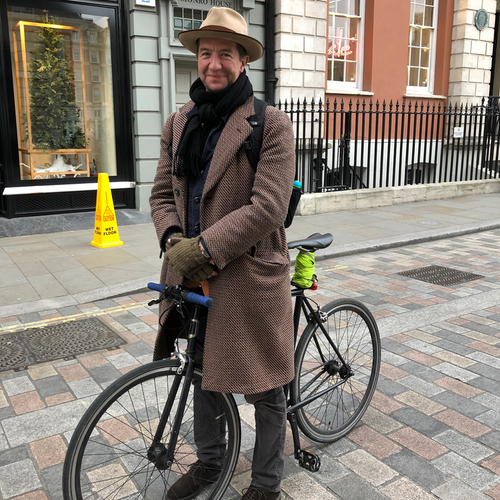
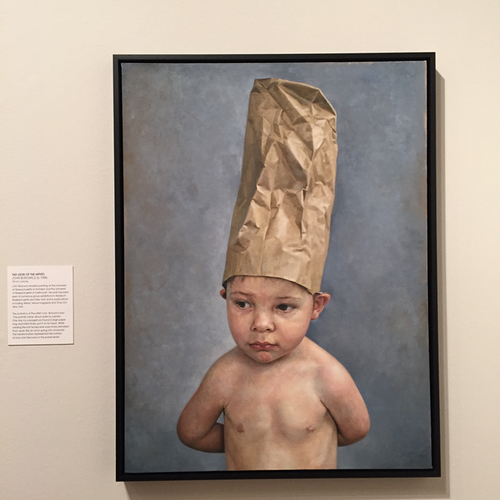
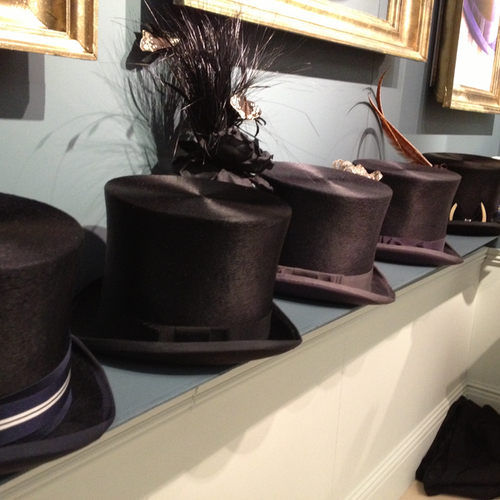
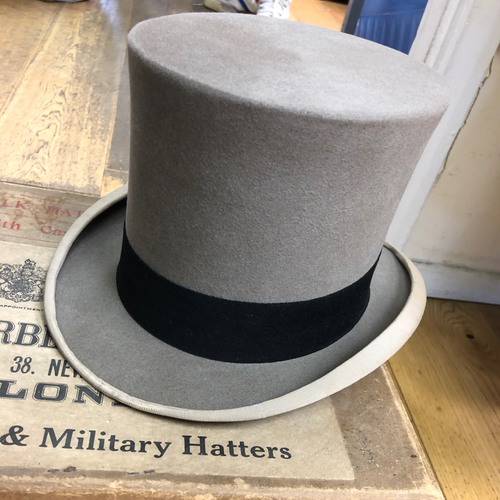
Man on the street at Covent GardenHats in old art at the National Portrait galleryHats in new art at National Portrait gallery, by John BorowiczVintage top hats on display
It is with a heavy heart and a fair amount of tears that I say good bye, at least good bye for now.
Love,
Leanne
As of October 2021, I will be settling into a new reality of making, teaching and writing about hats from Santa Cruz, California. Please, sign up for the newsletter to hear about new workshops and events.
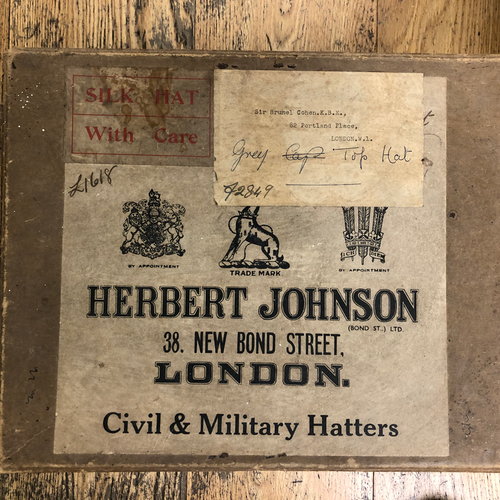
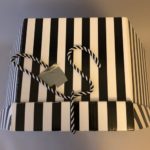
Bonus photos — A lovely find at a charity shop in Balham, London yesterday.
A Top Hat and Box that I over heard a charity shop manager discussing with a member of her staff and she allowed some photos.
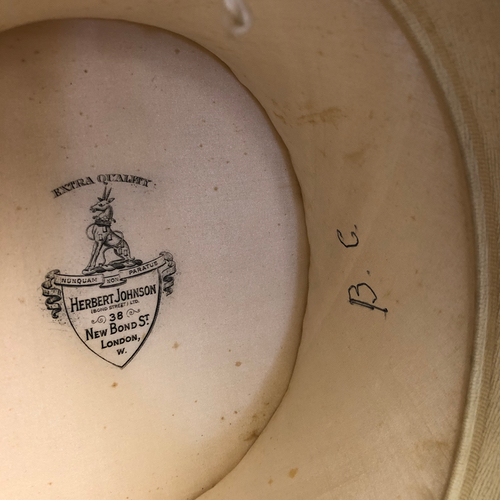
Beautiful grey silk top hat.Top hat box at Charity shop in BalhamTop hat silk lining, wide leather band, crest and initials
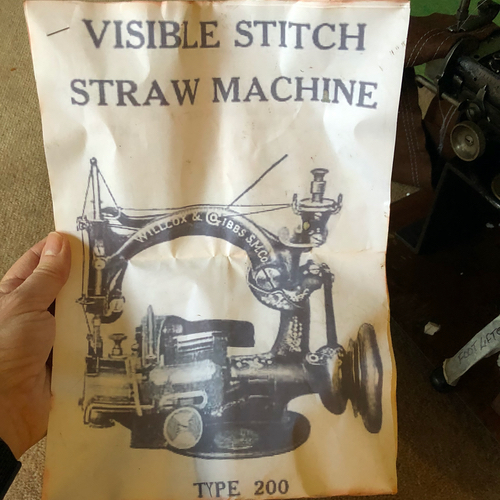
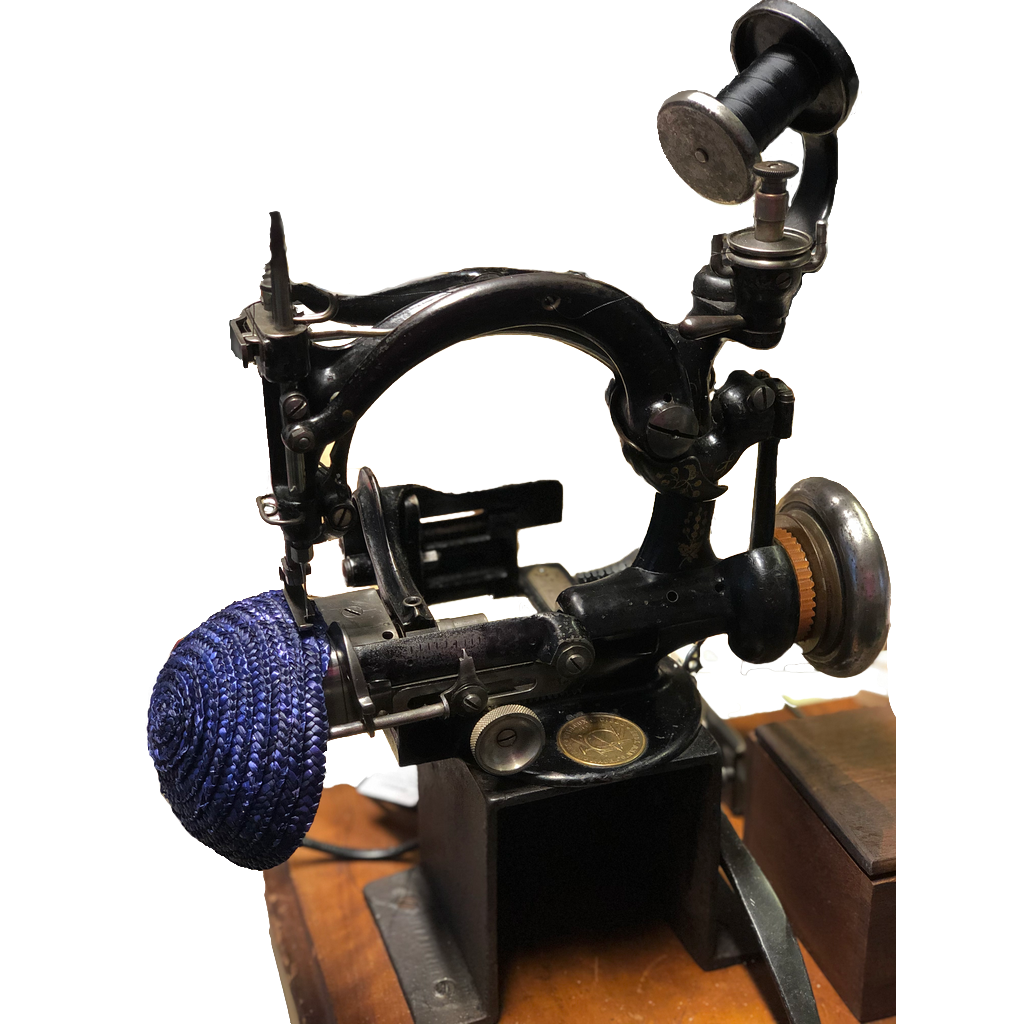
I have had two big ticket items on my millinery wish list for a while now.One is a hot block hat stretcher and the other is a Willcox & Gibbs straw sewing machine.I can now check off one of those items after winning an eBay auction a few weeks ago.
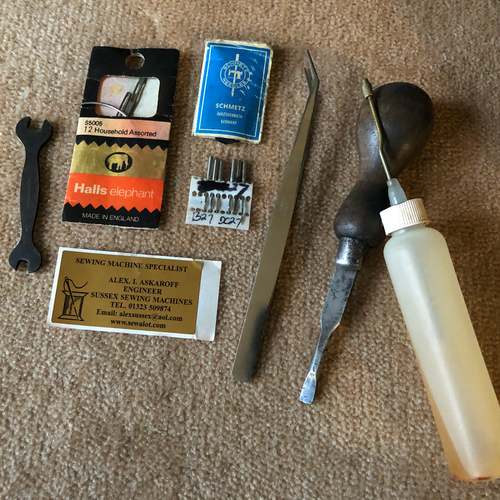
Treasures from the little tool box. Spanner (wrench), needles, tweezers, screw driver and oil bottle.
I was first introduced to the idea of a straw plait (braid) sewing machine while working at Edwina Ibbotson’s.There was one that sat in the corner with a clear upturned box covering it to protect the 17 Guinea, as she calls it, from being knocked about and keep the dust off.
I am not sure where the term 17 Guinea comes from as the Guinea was replaced by the Pound coin in 1816 and these machines are later 1800s and early 1900s. According to Wikipedia a Guinea is worth 1 Pound & 1 Shilling. The National Archives estimated the value in 1880 as equivalent £69.49 as of 2017. At the time it was worth 1 stone (6.35 kg/14 lbs) of wool or 3 days wages for skilled tradesman, which doesn’t seem like very much for a sewing machine.
Hatlines Issue 71, The Repair Shop
I have looked on and off over the years for a “17 Guinea” with no success. Not long ago the Hatlines magazine published by the Netherlands Hat Association, had an article about these old sewing machines. The article did a great job of showing how to clean and maintain the machines. It gave the names of several brands that I believe would fall under the name 17 Guinea and also gave me a sense of confidence in finding one.
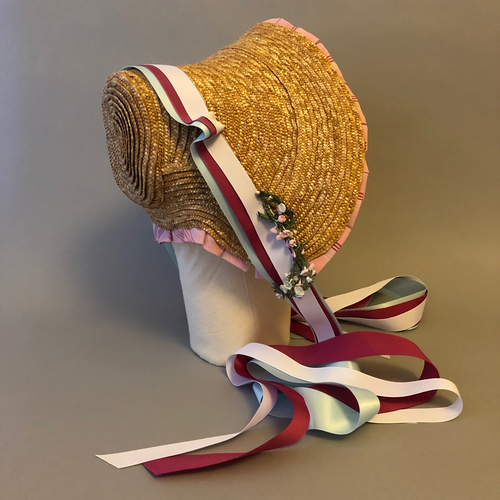
Straw Plait Bonnet by Leanne Fredrick MillineryStraw Plait hat in progress by Leanne Fredrick Millinery
I made several straw plait hats after taking a class from Jane Smith at Morley College, London and loved the process and the results. Jane’s class taught how to make the straw hats on a standard home machine.It is a bit tricky getting around the crown, but it can be done. Ever since I’ve desired to work with a proper straw plait machine.
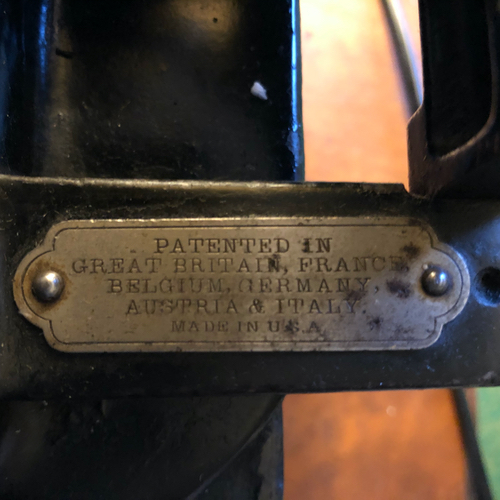
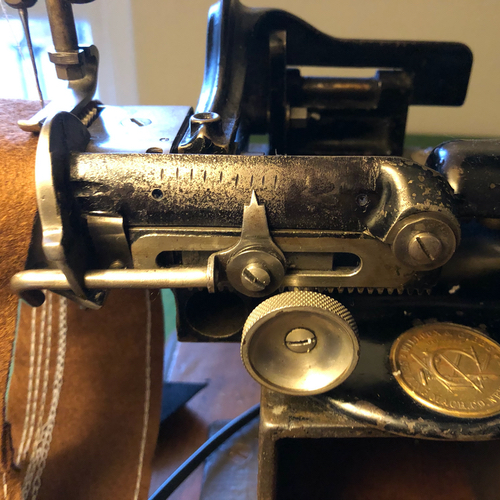
W&G S200 logo button – Look close, notice how the needles make a W for Willcox and the machine makes a G for GibbsW&G S200 patent plate
I don’t buy on eBay very often and even more rarely do I win, but I had been watching this machine and another on Gumtree. It was a Friday night and the auction ended at 8:15 pm.As the lastfew minutes of the auction approached, I entered my highest price, into the bidding system on eBay. It automatically bids in increments only until you are one increment above the last highest bidder, then stops. To my excitement, shock, amazement and delight.I won.
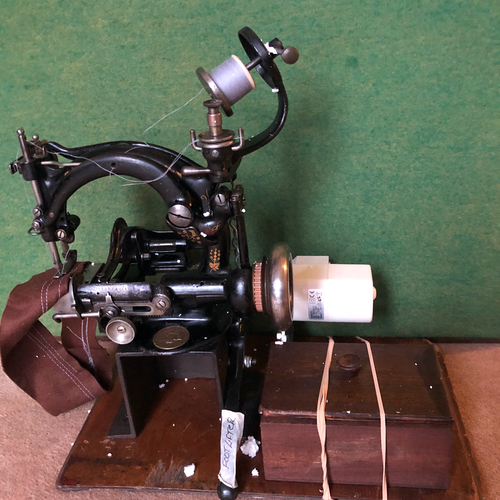
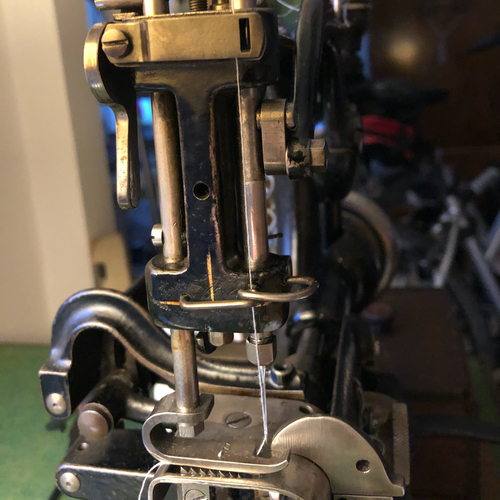
W&G S200 side view
Although we have stayed very close tohome in London since March, due to Covid, my husband and I adventured to Eastbourne to pick up the machine from Alex Askaroff. Followed by a stay at the Hydro Hotel. It was a good weekend.
W&G S200 seam gauge
It doesn’t look like much, but the new tensioner was patented around 1875, so my understanding is that this machine was made around 1880.
The video of my machine being demonstrated by Alex Askaroff.
Alex Askaroff’s YouTube Channel has some great videos if you are interested in vintage sewing machines. I love this kind of stuff.
Another nugget was in the little wooden treasure box was a print out of the following blog post by Mad Hatter, Cristina de Prada from 18 April 2009.The link to Jane Smith’s straw hat e-book is not longer active, but she has many of the patent illustrations which I think are fascinating.
These early machine made a chain stitch, rather than a lock stitch of the current sewing machines. A chain stitch doesn’t require a separate bobbin. The underside can be used as a lovely decorative stitch but the chain stitch is know to easily unravel if you break a stitch or don’t lock the end.
Great video on how to lock a chain stitch.
It is a different model machine but the concept is the same. Go to video at 7min 20sec for how to easily lock the chain.
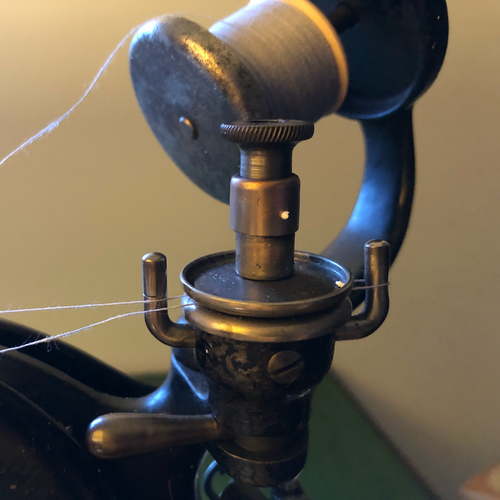
Me and my “new” machine are still getting to know each other. I love the way it sews and sounds, but so far I’ve only used up a lot of thread and made a little navy blue straw plait bowl, perhaps it will become a cocktail hat. I am excited to get a bit more time with my new W&G S200.
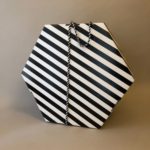
This is a pictorial on how to pack a basic hat in a hat box . This is appropriate for basic men and women’s hats. Unless you have a mother/aunt/grandmother who wore hats and used hat boxes or you worked in the industry, how are you suppose to know?
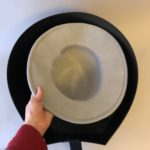
Check the Size
Hat box is just right
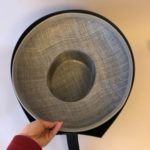
Hat box is too small
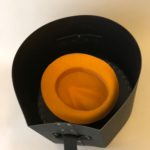
Hat box is too large
Choose the right size box is the first step. Keep in mind that the hat is always the right size. 🙂 I am using the medium size, Hattin’ Around Hat Case, which is perfect for my grey fedora. The grey straw would better fit in the large Hat Case. If it is too snug of a fit, there isn’t enough space to create a protective impact zone with tissue paper. The gold trilby would be better in the small sized Hat Case. If there is too much space you will need loads of extra tissue to keep it from moving around. The hat box dimensions are in the Hattin’ Around Hat Case link above.
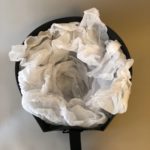
It is all about the tissue
Rumpled tissue, Left is too tight, Center is perfect, Right is too loose
Make a nest with tissue
Fill the crown with tissue
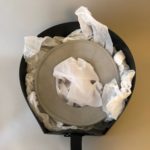
Nestle in the hat
Cover with more tissue
The tissue paper protects the crown while it supports the brim. You need to crumple & rumple the tissue to give it more body and structure. Don’t wad it into a hard ball or leave it too loose and floaty. I good medium amount of rumple is perfect.
Always use acid free tissue but what about buffered, acid free tissue? There is a really good blog post about buffered vs. unbuffered storage materials, which discourages using buffered storage materials with protein based textiles such as wool, silk, and feathers, which are common in high quality hats.
Make a layer of rumpled tissue across the bottom of the hat box and around the sides, creating a nest for the hat. Pack the crown with tissue to help it keep its shape. Settle the hat upside down into the nest. Add more tissue around the sides or if there are gaps. Finally, add another layer of tissue across the top to protect the hat from impact against the lid. Packing a hat when there are large trimming elements to consider will have to wait for another blog post.
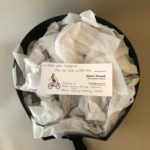
Finishing Touches
Add a little personal touch
A personal note or some relevant marketing piece.
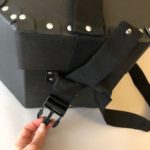
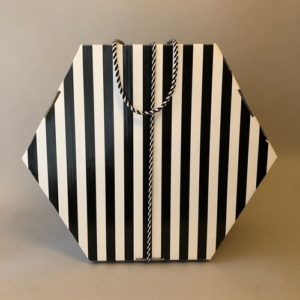
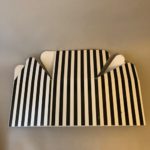
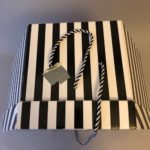
Put on the lid and buckle up
The use of a compliments slip was something I started doing since moving to the UK, but I like that it walks a line between formal letter head and a casual note. The compliements slip includes the important business contact details with space for a short personal note. I also like using a beautiful A5 (±1/2 Letter) photo marketing card.
The Hattin’ Around Hat Cases have durable, easy to use buckles to secure the lid. See my post on How to Assemble a Hat Box if you are using a flat pack cardboard hat box, as they frequently do not come with assembly instructions.
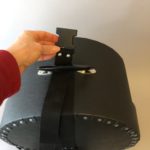
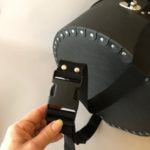
Connect the additional strap
Thread male buckle though bottom loop
Thread female buckle through top handle
Buckle ends together at back
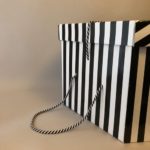
Hattin’ Around Hat Cases (small, medium & large) come with an additional strap that can be used to carry your hat case on your shoulder or on your back, which keeps your hands free and makes for easier travel.
I will work on a follow up post that offers some tips on how to pack a hat with special trimming such as long feathers or large bows.
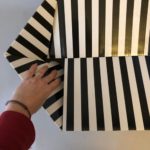
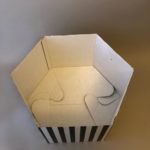
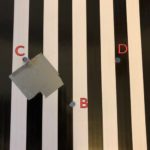
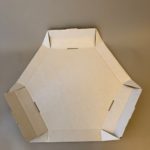
Confusion and embarrassment may result the first time you try to assemble a flat pack cardboard hat box. Some people may make you feel silly for not knowing how, but cardboard flat pack hat boxes frequently do not come with instructions. Once you’ve done it a few times it much easier but threading the cord handle almost always requires a few moments of thought. I hope this pictorial makes it easier.
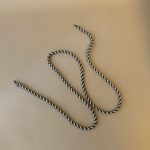
The three parts are the box, the cord handle and the lid. This box comes with a cord that has a flippy metal bit on the ends.
Hat Box
Cord Handle
Lid
Assemble The Box
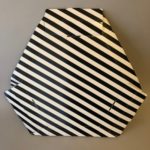
Hat box while flat
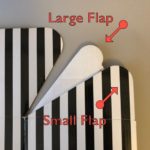
Observe large & small flaps
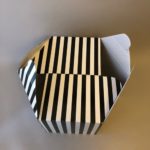
Open and turn upside down
Flatten bottom
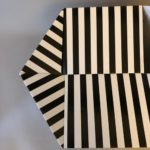
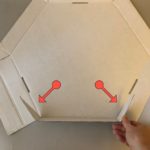
Fold small flap first
Fold large flap
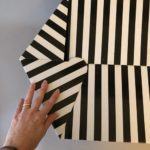
Press large flap until inside
One side done
Repeat steps on other side
Looking good
Check flaps are secure
Lay the box flat and notice which flap is smallest, it folds down first. The larger flap locks them both in place.
Start to open the box and turn it upside down. Start on one side and press the small flap down level with the base. This is the finesse part. It takes a bit of pressure but try not to be too heavy handed. Then press the large flap down, until it sit on top of the small flap, then press until they pop through to the inside. The base will fold in a bit, but will come back into place. Repeat on the other side.
Flip box over and make sure the flaps and the center of the base have all locked together securely.
NOTE: Check to make sure this is the proper size box for the hat you are packing, before you go through the rest of the steps as it is much more efficient to store the boxes flat than assembled. If you picked the wrong size, go to the bottom and follow the directions for collapsing the box.
Attach The Cord Handle
I am sorry about the duct tape to support the holes. I have managed to tear at least one hole in all of my card board hat boxes, with no new pristine ones at hand when writing this post.
Cord for Handle
You will need to tie knots if you don’t have these bits
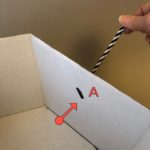
Single hole on bottom side
Three holes on the top side
Thread into B
Thread out of C
Thread into D
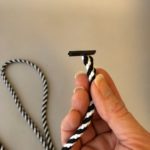
Flip the anchor bit
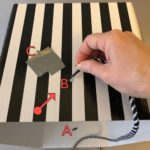
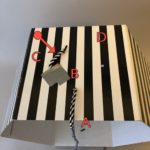
Start on the side with a single hole (A), this is the bottom when the box is standing on its side to be carried. Poke the cord through the hole from the outside to the inside. Flip the metal bit perpendicular to secure it or tie a knot if there is no metal bit.
Take the other end of the cord over to the other side which has three holes. Thread the cord from the outside to the inside through the single hole (B) closest to the open edge of the box.
Thread the cord from the inside to the outside of the box in either remaining hole, but I’ve chosen (C). Once on the outside of the box, draw cord through long enough to thread back down into the final hole (D), across from the previous hole (C). Flip the metal bit perpendicular to secure the final end or tie a knot.
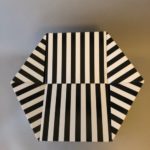
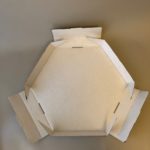
Assemble The Lid
Hat box lid flat
Flip to be face down
Fold in two pointy bits on three sides
Pointy bits match shape of lid
Fold other side bits from base and then fold again to notch.
Repeat on all three side
Lay box lid decorative side down. The folding creases are in place to guide you. Fold up the three sides that have pointy flaps on the edges. Fold in the flappy pointy bits at the crease, just a little to follow the shape of the lid.
The remaining three flaps are folded twice. The first fold is from the body of the lid, then fold the flap in half in toward the inside of the lid. There is a little notch that will pop into a cut out on the lid body. Often the factory cut cardboard piece is still in the hole, but will easily pop out. Repeat this process for all three sides.
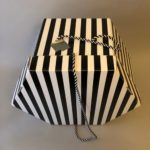
Put It Together
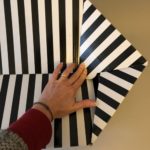
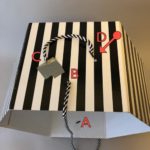
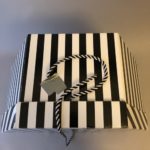
Align lid with box stripes at top
Bias is an option, but I like aligned.
Carefully pull handle cord to secure lid and lengthen handle
Position the box on the table, pack the contents of the box. Place the lid with the stripes of the lid going in the same direction as the box. It is rare that the stripes line up precisely as I would like. There are two sides where the stripes go in the same direction, I like the side that is smooth and doesn’t have the cut out from the lid flap.
Pull up to cord at the handle carefully to not tear the holes. The cord will secure the lid to the box when you hold the handle. I think this is rather clever. If this doesn’t work, you have possibly threaded the cord handle incorrectly, see images below. You will need to re-thread the cord handle.
Whoops – Handle Awkward. Redo cord handle.
Whoops – Handle Unbalanced. Redo cord handle.
Whoops – Handle trapped. Redo cord handle
Success – you are good to go
Collapse The Box
Take the lid and the cord handle off the box. Flip the box upside down, the press down of the flap sides until they release the lock from the center base. Pull the largest flap out first, it is a little fiddly. The smaller flap will follow easily.
Caution: A light weight hat in a large cardboard hat box will act like a kite in the wind. If you don’t want to whack your new box & hat on a nearby light post or worse a passerby following a gust of wind, you may need to hold the handle closer to the box and loop a finger through the cord that secures the lid.
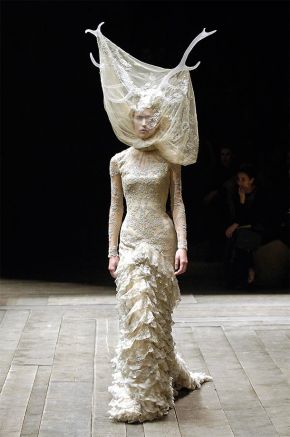
The Alexander McQueen exhibit Savage Beauty at the Victoria & Albert Museum (V&A) is spectacular.
I have been to several exhibits at the V&A over the last few years. David Bowie was good, Horst was a pleasant surprise, the Italian exhibit was a disappointment. But the Alexander McQueen exhibit is not to be missed. It has been so popular that my husband and I got tickets for, get this, 8:45 AM on a Sunday morning. I was great. There were people there but it wasn’t crowded.
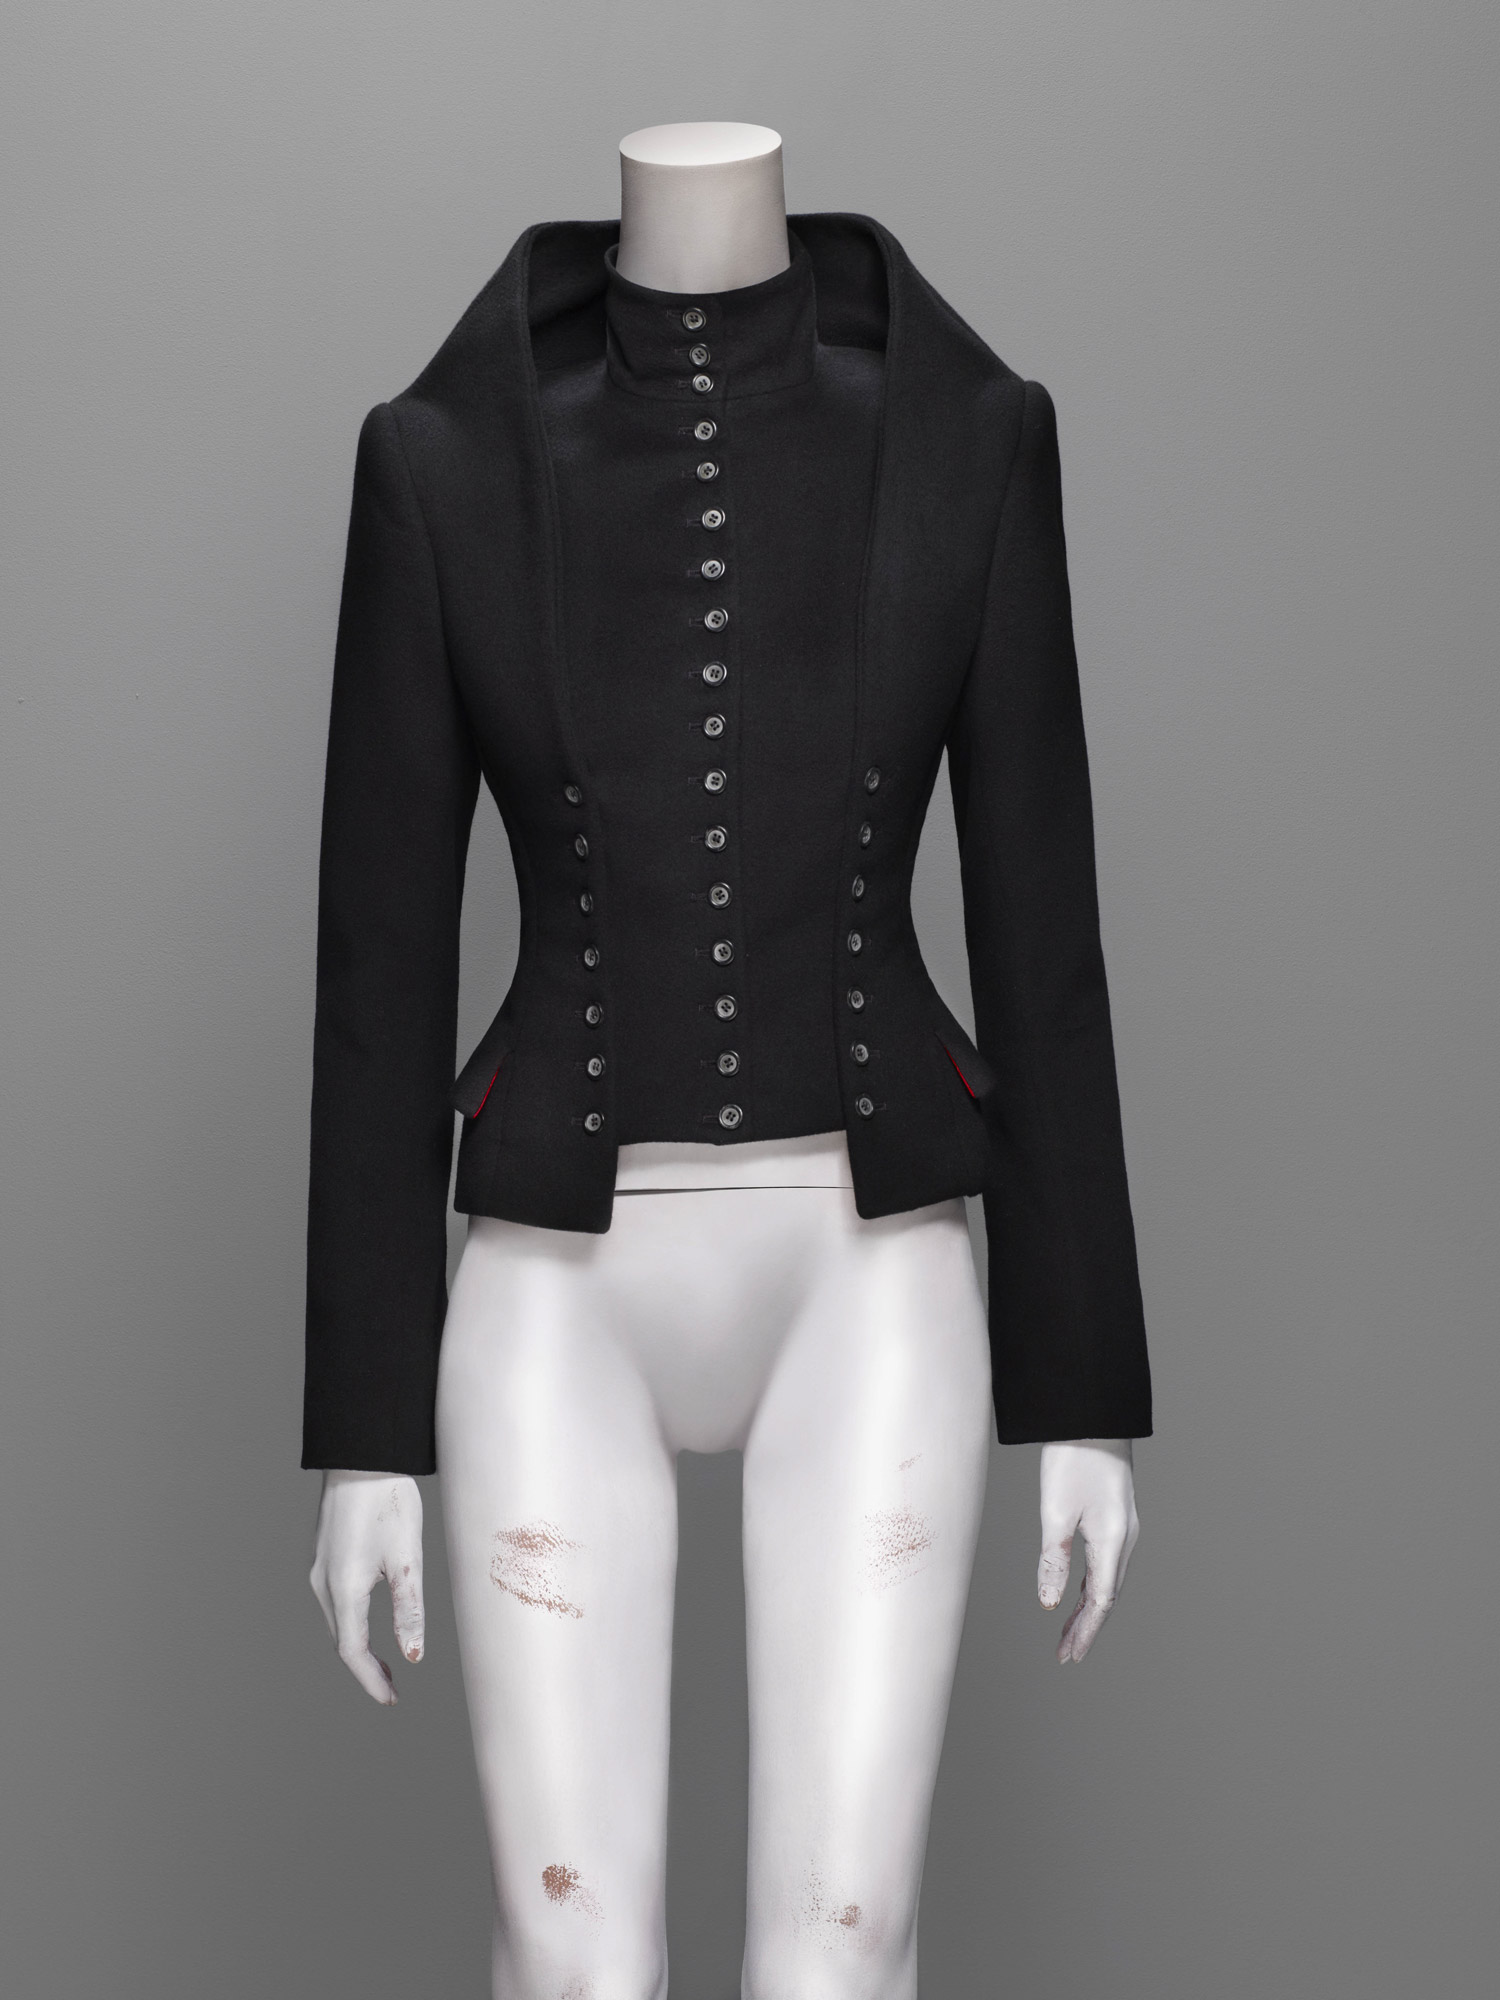
It starts with his craftsmanship in tailoring, then takes you right into some really dramatic pieces, each room a new visceral experience.
I want to empower women. I want people to be afraid of the women I dress.
And many of his designs are very powerful.
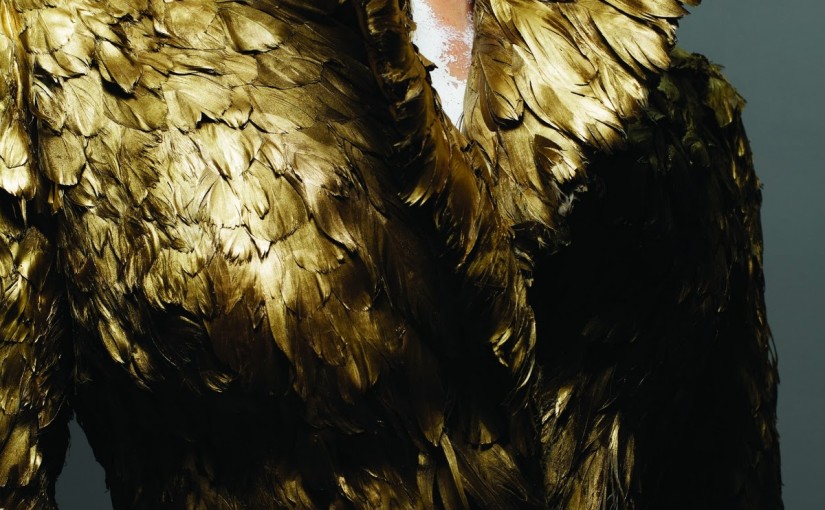
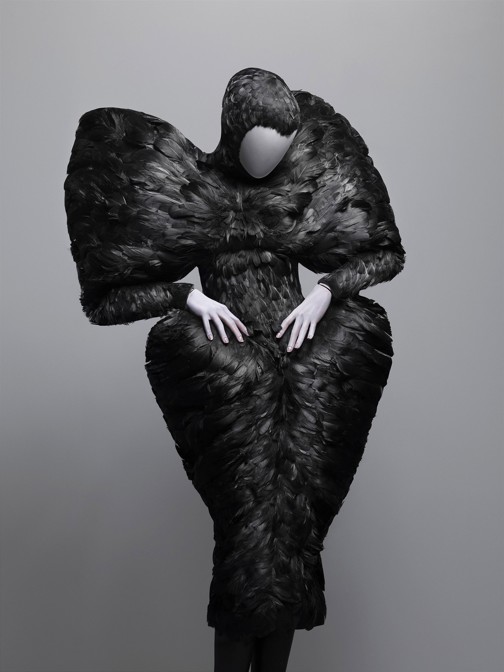
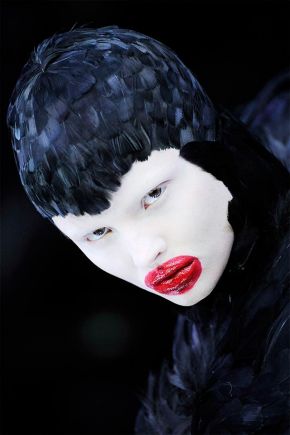
I am not much for birds. Don’t get me wrong I like birds, but I don’t really think about them much. Since starting in millinery, I think about them a lot more, particularly their feathers. McQueen’s use of feathers is astounding.
“I don’t see it as aggressive – I see it as romantic, dealing with a dark side of a personality.”
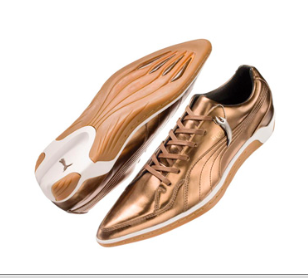
Not long after moving to London, my daughter and I were getting on the tube, and there was a man in front of us with the most amazing shoes. To my daughter’s embarrassment, I asked him about his shoes, he said they were Alexander McQueen. That was the first time I remember connecting that name with a piece of clothing. They looked something like this.
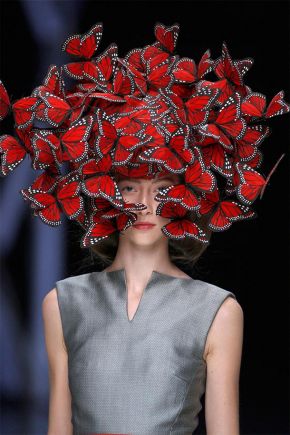
Things start to connect. Alexander McQueen’s graduation collection was bought by Isabella Blow. Phillip Treacy made lots of hats and head pieces for Isabella Blow and for Alexander McQueen. I don’t know the order of things, but it is cool when things start connecting. I’d heard of the Phillip Treacy butterfly headdress, but I hadn’t known it was made for Alexander McQueen.
Whether you are into fashion or not, this exhibit has something for everyone. Just to give you an idea of the breadth of experience. My husband who is in the Technology field and a friend’s husband who is a taxi driver, both enjoyed it.
I hate to over sell the exhibit and have you be disappointed, but there were times that I was nearly in tears at the extent of his creativity and mastery. The time, the materials, the craftsmanship, sigh. However with that said many of the things on exhibit are definitely wearable art / performance wear.
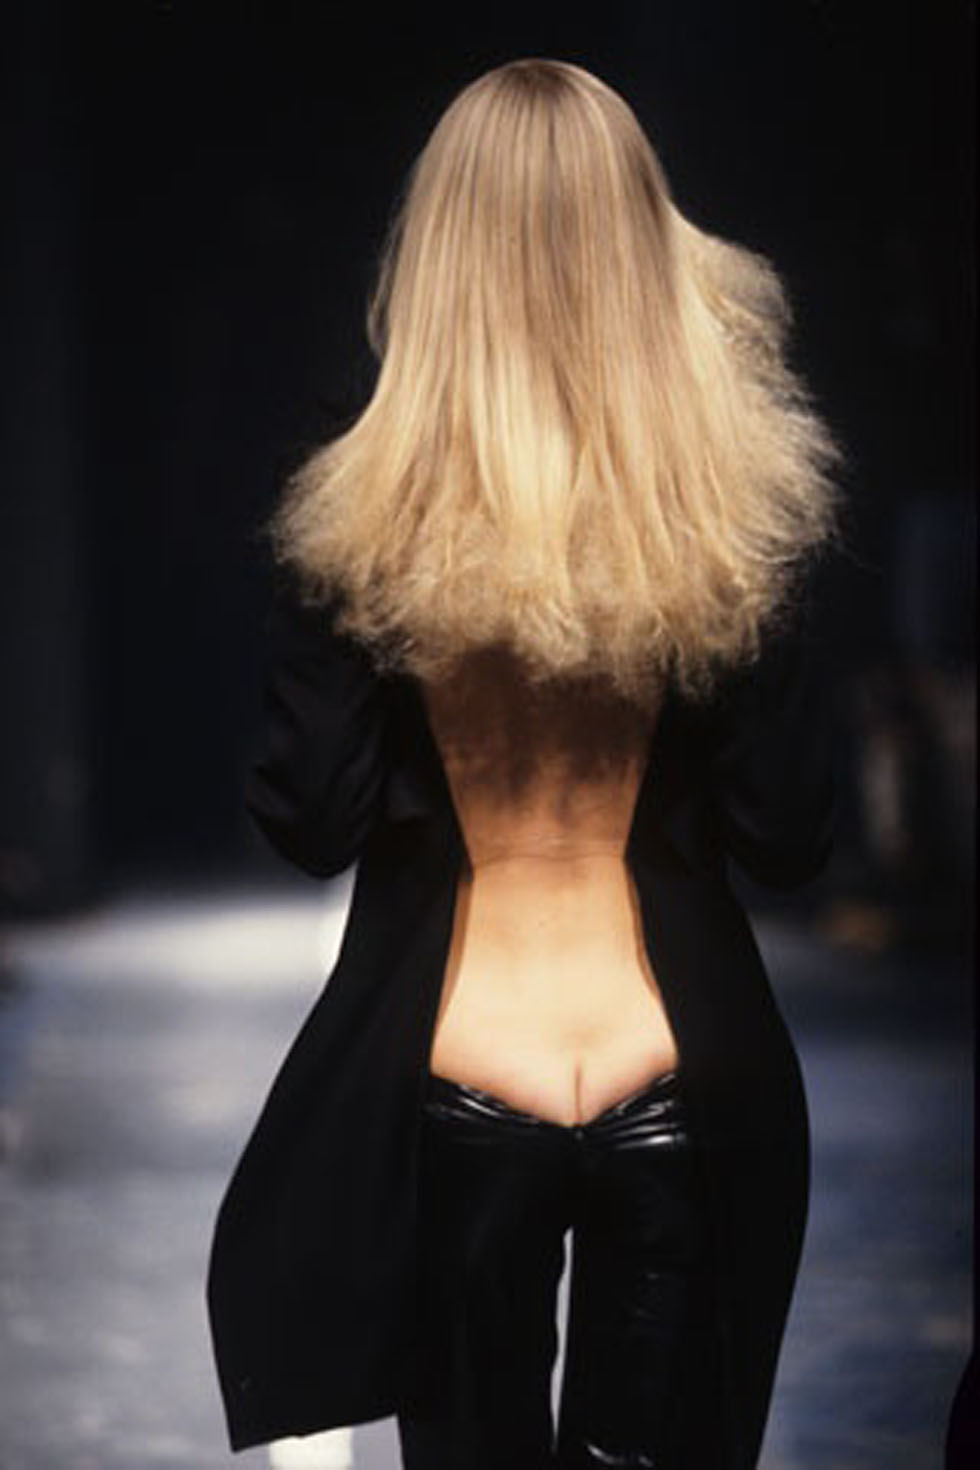
In the 1990’s McQueen’s trousers often were very, very low in the back and seemed to just cling to the buttocks, known as Bumsters. Wasn’t this about the time when this low back tattoos became popular. We used to call them whale tale tattoos. I wonder if those two things are related.
many of the images were from the V&A website, shoe image from sneakerfreaker.com,