Willcox & Gibbs S200

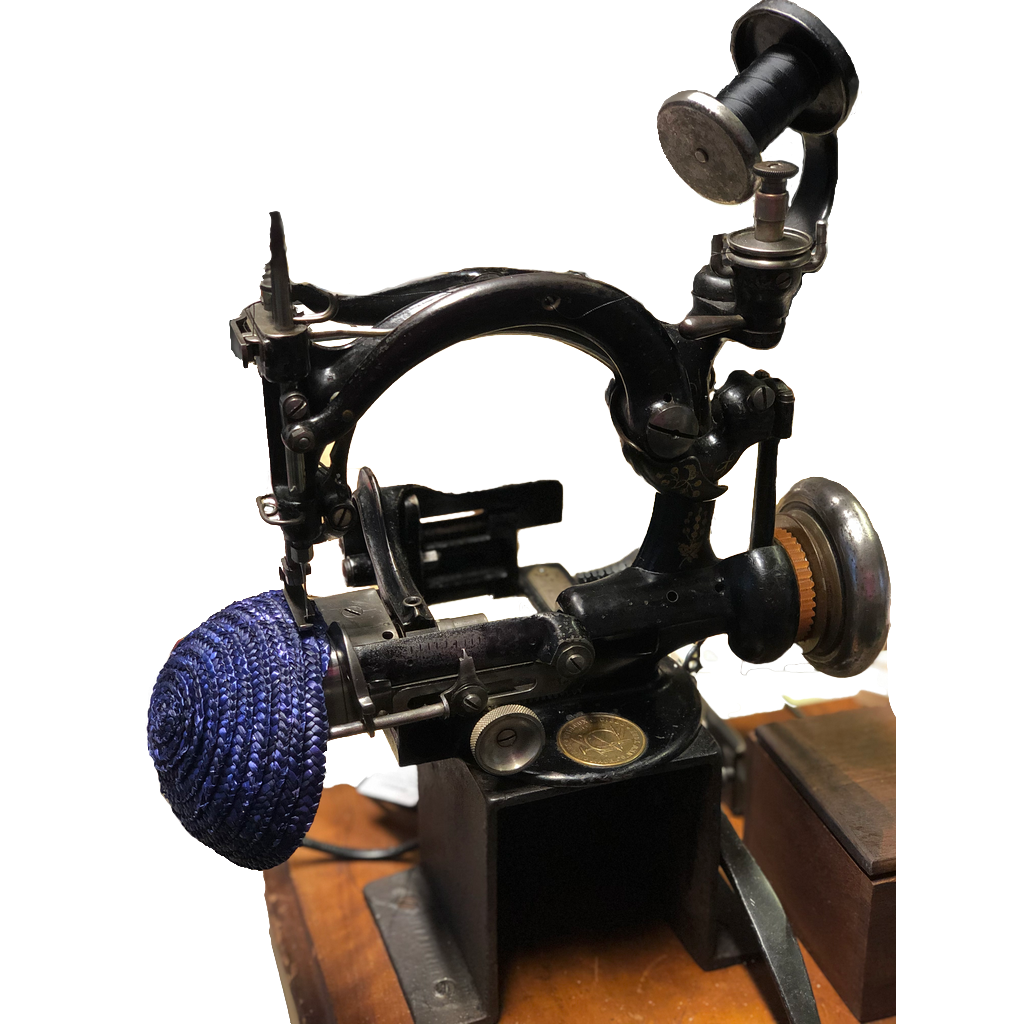
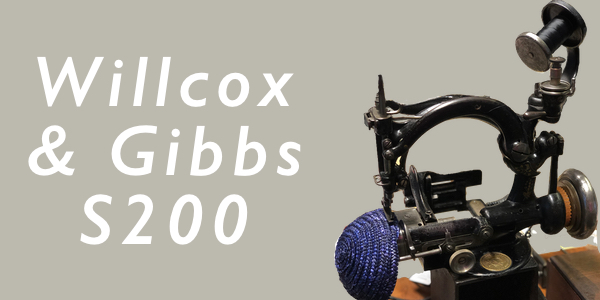
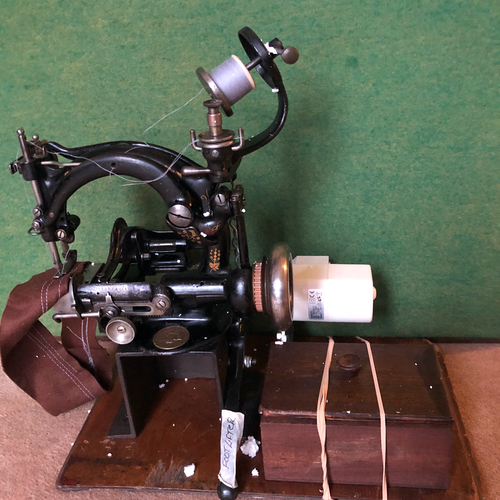
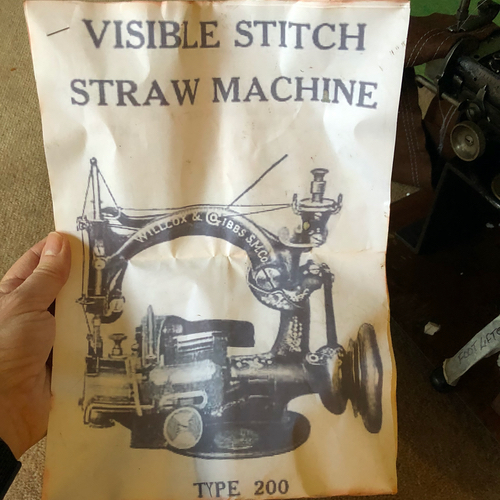
Introducing my new baby, a Willcox & Gibbs S200 straw plait (braid) sewing machine.  Here are some pictures of the machine and interesting links to 17 Guinea, Hatlines #71, Straw hats, Alex Askaroff, Mad Hatter Blog, and how to lock a Chain Stitch

Willcox and Gibbs S200 Straw plait sewing machine
Willcox and Gibbs S200

I have had two big ticket items on my millinery wish list for a while now.  One is a hot block hat stretcher and the other is a Willcox & Gibbs straw sewing machine.  I can now check off one of those items after winning an eBay auction a few weeks ago.

Treasures from the little tool box
Treasures from the little tool box. Spanner (wrench), needles, tweezers, screw driver and oil bottle.


I was first introduced to the idea of a straw plait (braid) sewing machine while working at Edwina Ibbotson’s.  There was one that sat in the corner with a clear upturned box covering it to protect the 17 Guinea, as she calls it, from being knocked about and keep the dust off.  

I am not sure where the term 17 Guinea comes from as the Guinea was replaced by the Pound coin in 1816 and these machines are later 1800s and early 1900s. According to Wikipedia a Guinea is worth 1 Pound & 1 Shilling.  The National Archives estimated the value in 1880 as equivalent  £69.49 as of 2017. At the time it was worth 1 stone (6.35 kg/14 lbs) of wool or 3 days wages for skilled tradesman, which doesn’t seem like very much for a sewing machine.

Hatlines Issue 71, The Repair Shop

I have looked on and off over the years for a “17 Guinea” with no success.  Not long ago the Hatlines magazine published by the Netherlands Hat Association, had an article about these old sewing machines. The article did a great job of showing how to clean and maintain the machines. It gave the names of several brands that I believe would fall under the name 17 Guinea and also gave me a sense of confidence in finding one.

Straw plait bonnet
Straw Plait Bonnet by Leanne Fredrick Millinery
Straw Plait hat in progress
Straw Plait hat in progress by Leanne Fredrick Millinery

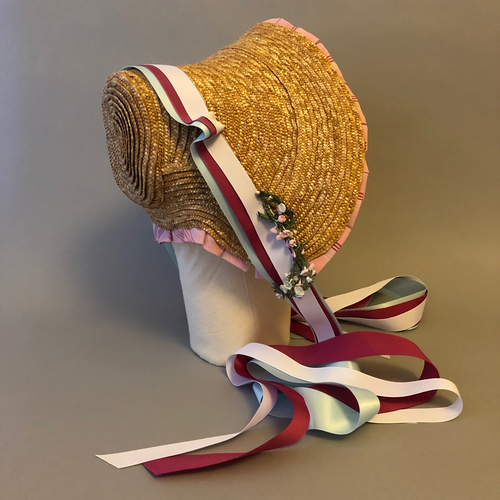
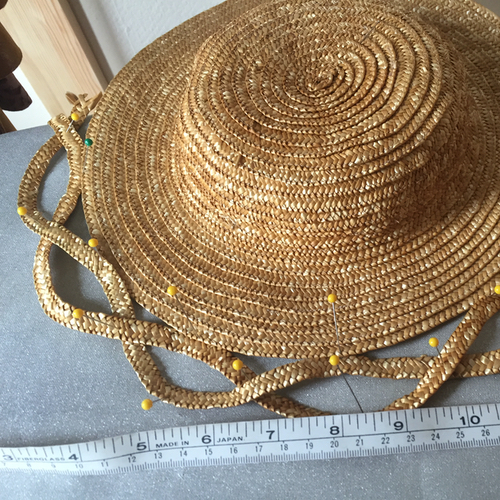
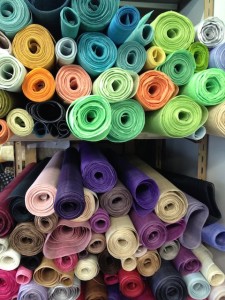
I made several straw plait hats after taking a class from Jane Smith at Morley College, London and loved the process and the results.   Jane’s class taught how to make the straw hats on a standard home machine.  It is a bit tricky getting around the crown, but it can be done. Ever since I’ve desired to work with a proper straw plait machine.

W&G S200 logo button
W&G S200 logo button – Look close, notice how the needles make a W for Willcox and the machine makes a G for Gibbs
W&G S200 patent plate

I don’t buy on eBay very often and even more rarely do I win, but I had been watching this machine and another on Gumtree. It was a Friday night and the auction ended at 8:15 pm.  As the last few minutes of the auction approached, I entered my highest price, into the bidding system on eBay.   It automatically bids in increments only until you are one increment above the last highest bidder, then stops. To my excitement, shock, amazement and delight.  I won.

W&G side view
W&G S200 side view

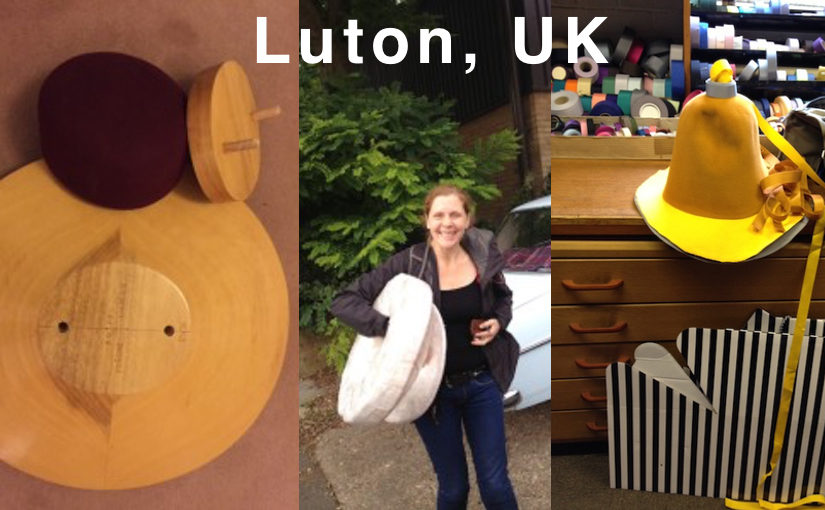
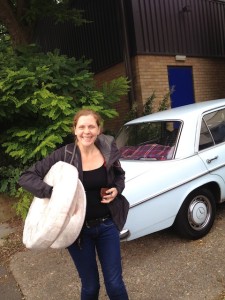
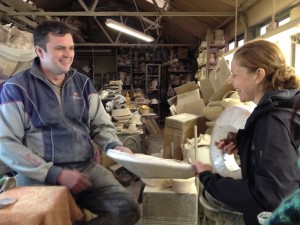
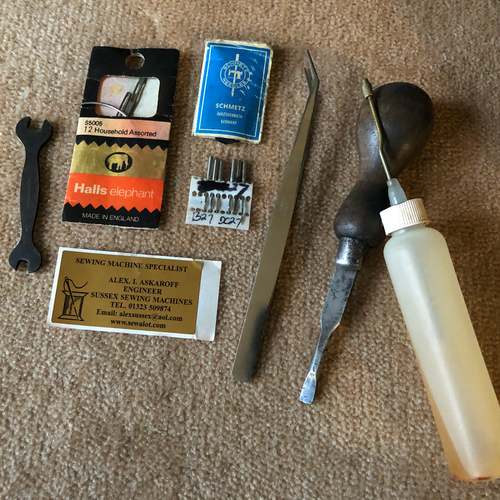
Although we have stayed very close to home in London since March, due to Covid, my husband and I adventured to Eastbourne to pick up the machine from Alex Askaroff. Followed by a stay at the Hydro Hotel. It was a good weekend.  

W&G S200 seam gauge
W&G S200 seam gauge

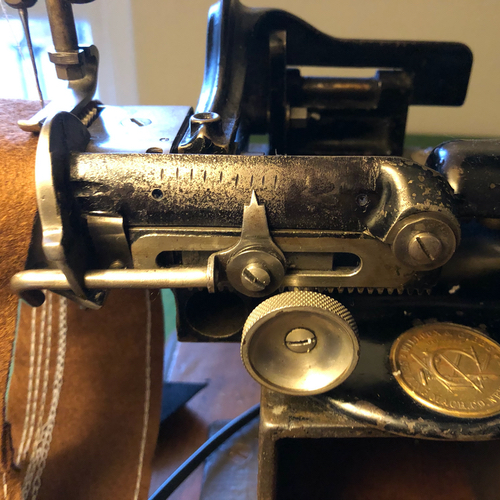
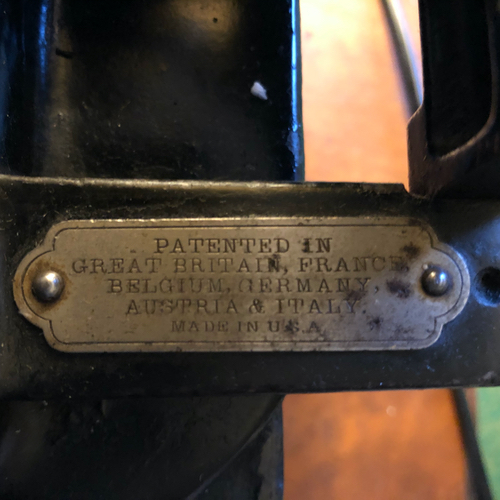
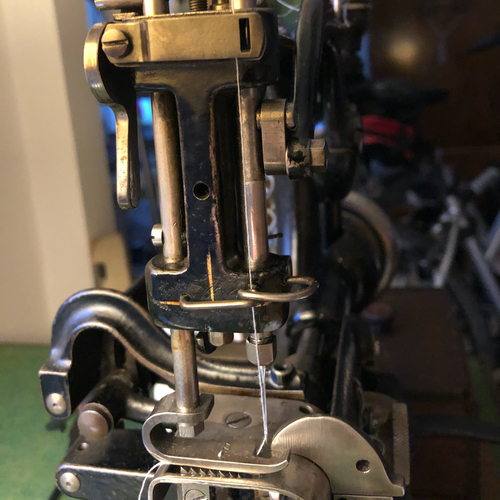
It doesn’t look like much, but the new tensioner was patented around 1875, so my understanding is that this machine was made around 1880. 

The video of my machine being demonstrated by Alex Askaroff.

Alex Askaroff’s YouTube Channel has some great videos if you are interested in vintage sewing machines.  I love this kind of stuff.

Another nugget was in the little wooden treasure box was a print out of the following blog post by  Mad Hatter, Cristina de Prada from 18 April 2009.  The link to Jane Smith’s straw hat e-book is not longer active, but she has many of the patent illustrations which I think are fascinating.

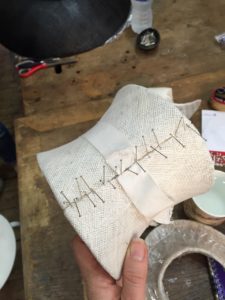
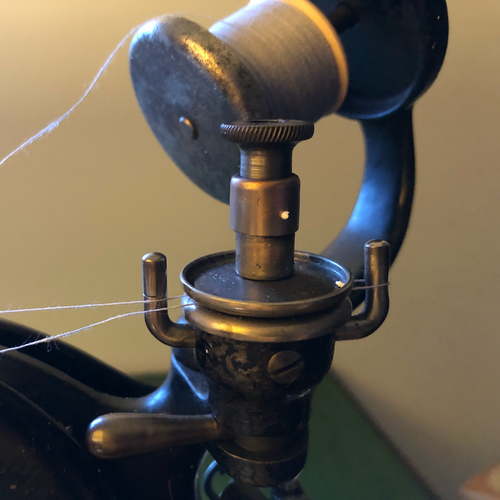
These early machine made a chain stitch, rather than a lock stitch of the current sewing machines.  A chain stitch  doesn’t require a separate bobbin. The underside can be used as a lovely decorative stitch but the chain stitch is know to easily unravel if you break a stitch or don’t lock the end.

Great video on how to lock a chain stitch.
It is a different model machine but the concept is the same. Go to video at 7min 20sec for how to easily lock the chain.

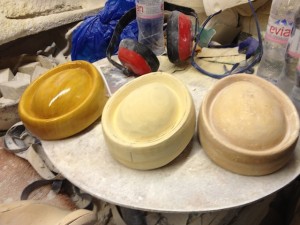
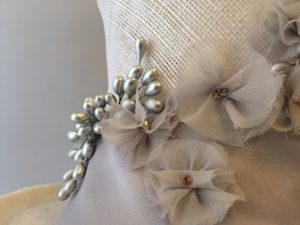
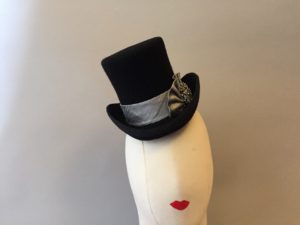
Me and my “new” machine are still getting to know each other. I love the way it sews and sounds, but so far I’ve only used up a lot of thread and made a little navy blue straw plait bowl, perhaps it will become a cocktail hat. I am excited to get a bit more time with my new W&G S200. 

I found it…Trip to Luton Blog Post

It was autumn 2013 and I was surprised with an invite to join Edwina Ibbotson and another apprentice, Mee on a field trip up to Luton to visit three millinery suppliers. 

This was originally written years ago. I am delighted to say all three vendors are still trading in Luton, UK. Why am I posting this now?  I was working on my latest article for The Hat Magazine #86 about the differences between how Hatters use hat blocks verse how Milliners use blocks and I needed images.  Photos have been trickier to get during the Covid lockdown.

The Hat Magazine #86 Cover The Hat Magazine 86 Hat Blocks

I knew I had images of the Boon & Lane block makers, but I could not find them.  Crazy frustrated, I let it go and waa-laa, like magic, a few days after the finished magazine* arrives in the post. I stumbled across the blog post about my trip to Luton, UK on an old neglected website I wrote prior to Hattin’ Around.  There was also an embarrassing early attempt at a podcast, but I am going to leave that behind for now.

I hope my reminiscing about hat related discoveries in Luton will bring you joy as it did me. I also don’t want to lose it again.

Back to the original blog post…

Boon & Lane the block makers, Baxter, Hart & Abraham suppliers of felt, straw, and petersham, and Randall Ribbons suppliers of feathers, flowers, an endless array of sinamay colors and much more.

Mee, Leanne, Edwina arrive in Luton
Just arrived in Luton, Mee, Me and Edwina

We drove to Luton in Edwina’s light blue vintage Mercedes. That is an experience unto itself. It took me a while to figure out how to do the old hook and magnet seat belts. The journey to Luton is about 40 miles through London and took nearly 2 hours, but we arrived mid morning at our first destination, Boon & Lane.

Edwina with vintage blue
Edwina with vintage blue and her hat block proto types

Boon and Lane  are the block makers. This was an experience to remember. There were two men working in the block factory that was filled with wood and sawdust on one half and different types of sand on the other. They make both wood and aluminium (also spelled aluminum in the USA, so the reason we pronounce this word differently is that it actually spelled differently in the UK vs US) blocks.  The aluminium blocks are used for industrial use, where they are attached to a heating device and there is a top and bottom piece that clamps together to form the hat shape all at once.

Steve Lane Aluminium hat block sand
Steve Lane tamping sand for Aluminium hat block cast

Alan Davies and Steve Lane make everything.  When I was there, Alan was working on wood blocks while Steve handled the sand packing in preparation for the molten aluminium. They were welcoming and generous with their time. Explaining what they were doing, the stages of making a hat block and showing Mee and I the various pieces of equipment.

Alan Davies talking with Edwina
Alan Davies talking with Edwina about her latest shapes

Thus far in my hat career, I’d done very little blocking, but I was completely seduced by being there. As you are sure to have guessed, today would be my first custom made block purchase.

stages of finish of a wood hat block
Stage of finish of a wood hat block, R>L

I choose a large downward flat 45 degree brim block and an oval head shaped flat topped crown block with slightly rounded edges (known as a square crown), to contrast the domed oval crown block (known as a round crown) I had in my very limited collection. It took a couple of months for the blocks to be made. Shortly before Christmas, Edwina came back one day with her new blocks along with my freshly varnished crown and brim blocks.

crown brim collar hat blocks
My new blocks from Boon and Lane. The crown has a felt on it, to take it up a hat size to fit my larger than average head.

They were beautiful shiny golden yellow with my name and the year stamped into them. The excitement was only dimmed a bit as I tried to figure out how I was going to get this massive brim block home on my bike. Alas, I could only manage the crown block that day on the bike, I’d have to wait and bring it home on the bus a couple days later. 

treasures from BHA
My treasures from Baxter, Hart and Abraham. Hat box, felt hood, capeline and petersham.

Next stop –Baxter, Hart & Abraham, suppliers to the millinery trade. This place is tidy and well organized. The textile junkie in me thrilled to touch the various different felts. Wool felt, fur felt, and the really furry felts called Melusine. Then there was the colors. My shopping strategy goes, walking around and gather everything I want.  Then doing a mental subtotal of how much it will cost. Feel anxious about how much I have. Then putting back some of my treasures, until I don’t feel the sense of financial panic. I bought several wool felts to practice on without too much financial impact, but my prize purchases were a yummy small (cone) cognac (gold) and a beautiful large (capeline) grey fur felt. It was glorious and I was so nervous at messing  up the fur felts. I envisioned a gray (grey) large brimmed hat with a fairly simple crown that I could wear all winter. However, it wasn’t going to be that winter that I’d get to wear it. [Update: I made a trilby with the cognac and fedora with the grey, which I still wear today] 

Sinamay colours
Sinamay colours at Randall Ribbons

Last stop- Randall Ribbons, the makers of all things feathers and flowers. They had a minimum order. Their website says a minimum order of £30.  I did not spend anything at Randall Ribbons. 

Feather samples
Feather sample board at Randall Ribbons

I think I was a bit overwhelmed by this point.  I had placed a rather sizable order at the block makers, and purchased enough felt at the millinery suppliers to keep me busy for a while. And honestly I just could not envision how I would trim these new hats of mine. I would have bought a simple hat pin or something, but with a minimum order, I left with nothing. I cannot say the same for Edwina or Mee.

Boxes of silk flowers
Just a small portion of the boxes of flowers.

We only went to three places, but it was a full day. Many thanks to Edwina for the tour of Luton and Mee for being a newbie like me. It was nice to be able to listen to someone else’s questions.

Prior to moving to the UK, I’d never heard of Luton. Since the field trip, I’ve heard Luton mentioned several times in relation to the hat making and millinery industry.  Luton was very active in the making of straw hats in their hay day. Which became more real to me because I have just begun taking a strip straw class at Morley College with Jane Smith.

…The end

It has been a pleasant walk down memory lane. I admit  to making a few revisions.

*Many thanks to Elly Stemerdink for the fabulous photos for the hat block article.

My Birthday Hat – Mini Topper Sinamay

My life does not have nearly enough “occasion” hat wearing opportunities, so when I was approaching a milestone birthday I decided it was going to be a hat event.  A mini top hat (topper) would be perfect, festive and small enough for easy travel.

I have wanted to make a mini topper for ages. What is it about things in miniature that are so appealing? Beautiful dolls houses, tiny baby clothes, exquisite Fabergé eggs, even well made Barbie clothes I find intriguing. My hats isn’t super tiny, maybe I should call it a midi topper?

Without a firm plan in mind about trimming and nor a 5 piece top hat block, I set to learning how to make a mini topper in sinamay on a buckram and wire framed block, with the mentoring of Edwina Ibbotson during her evening Hat Class.  The mystery was how to get it off the block once it is has dried and been stiffened. If you practicing millinery, you will notice the under cut of a waisted topper as a red flag. Unless you use a 5 piece block that you can take the block apart to extract it from the hat rather than pry the hat off the block, an under cut means you either carefully cut the hat, or destroy the block, neither seemed a good choice for a sinamay hat.

What I Learned…

      • To get the hat off the block without damaging the block or creating a cut edge on the straw, wrap the straw to meet in the back then fold the raw edges to the outside on the first layer. It is tricky to get it to butt together and stay put. I used lots of pins. The second and third layers are butted with the ends folded to the inside. Also use a wide petersham ribbon to hold the waist in while dries. Once off the block you have to sew each layer closed. Starting with the inside layer.

    • It is made in three pieces, the brim, the crown and the tip (top of the crown), make sure you mark the matching up points, especially for the “round” crown & “round” tip.
    • Making a band for an asymmetrical hat with extreme and changing angles is really difficult. I finally fashioned a pattern out of some bias muslin. It was not perfect but that is okay. I used the flaws to guide some of the flower placement.

  • Working within the hat to make invisible stitches between the layers was challenging.  I feel good about the quality of finish I achieved.
Inside finish with covered seams.
Outside wired edge finished with a bias band.

There are lots of steam punk mini toppers which are fun, but I was looking for something lighter. I have a thing for grey and I had some amazing silver little wired stamens from Masario, which I was hankering to use. I had some leftover grey silk georgette that I loved working with on a previous project and experimented to create little bias cut flowers with a dusty pink bead for the center to add just a hint of warmth.


I was sewing the last bits on just an hour before my birthday party. I am delighted with the result.

I have since carved a mini topper block myself and made a variation in felt. It is a different technique with felt. Hopefully I can do a “What I Learned…” for that hat soon.

I would love hear if you have ideas on how to work with an undercut hat block.

Cheers, Leanne