
My life does not have nearly enough “occasion” hat wearing opportunities, so when I was approaching a milestone birthday I decided it was going to be a hat event. A mini top hat (topper) would be perfect, festive and small enough for easy travel.

I have wanted to make a mini topper for ages. What is it about things in miniature that are so appealing? Beautiful dolls houses, tiny baby clothes, exquisite Fabergé eggs, even well made Barbie clothes I find intriguing. My hats isn’t super tiny, maybe I should call it a midi topper?
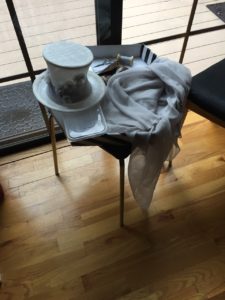
Without a firm plan in mind about trimming and nor a 5 piece top hat block, I set to learning how to make a mini topper in sinamay on a buckram and wire framed block, with the mentoring of Edwina Ibbotson during her evening Hat Class. The mystery was how to get it off the block once it is has dried and been stiffened. If you practicing millinery, you will notice the under cut of a waisted topper as a red flag. Unless you use a 5 piece block that you can take the block apart to extract it from the hat rather than pry the hat off the block, an under cut means you either carefully cut the hat, or destroy the block, neither seemed a good choice for a sinamay hat.
What I Learned…
-
-
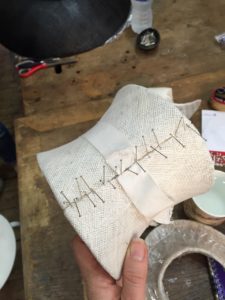
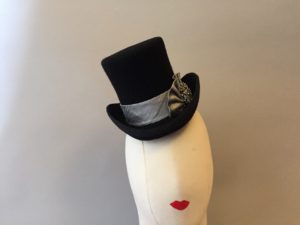
- To get the hat off the block without damaging the block or creating a cut edge on the straw, wrap the straw to meet in the back then fold the raw edges to the outside on the first layer. It is tricky to get it to butt together and stay put. I used lots of pins. The second and third layers are butted with the ends folded to the inside. Also use a wide petersham ribbon to hold the waist in while dries. Once off the block you have to sew each layer closed. Starting with the inside layer.
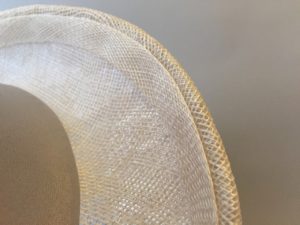
- It is made in three pieces, the brim, the crown and the tip (top of the crown), make sure you mark the matching up points, especially for the “round” crown & “round” tip.
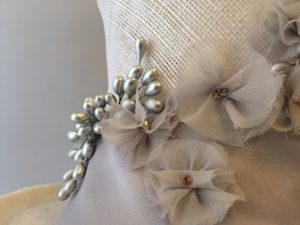
- Making a band for an asymmetrical hat with extreme and changing angles is really difficult. I finally fashioned a pattern out of some bias muslin. It was not perfect but that is okay. I used the flaws to guide some of the flower placement.
-
- Working within the hat to make invisible stitches between the layers was challenging. I feel good about the quality of finish I achieved.

There are lots of steam punk mini toppers which are fun, but I was looking for something lighter. I have a thing for grey and I had some amazing silver little wired stamens from Masario, which I was hankering to use. I had some leftover grey silk georgette that I loved working with on a previous project and experimented to create little bias cut flowers with a dusty pink bead for the center to add just a hint of warmth.
I was sewing the last bits on just an hour before my birthday party. I am delighted with the result.
I have since carved a mini topper block myself and made a variation in felt. It is a different technique with felt. Hopefully I can do a “What I Learned…” for that hat soon.
I would love hear if you have ideas on how to work with an undercut hat block.
Cheers, Leanne