

Confusion and embarrassment may result the first time you try to assemble a flat pack cardboard hat box. Some people may make you feel silly for not knowing how, but cardboard flat pack hat boxes frequently do not come with instructions. Once you’ve done it a few times it much easier but threading the cord handle almost always requires a few moments of thought. I hope this pictorial makes it easier.
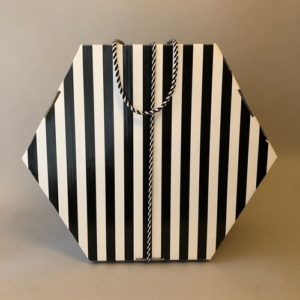
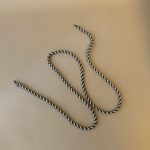
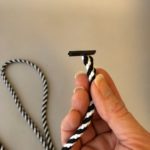
The three parts are the box, the cord handle and the lid. This box comes with a cord that has a flippy metal bit on the ends.

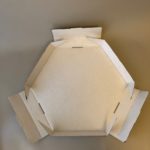
Assemble The Box

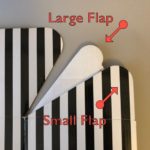


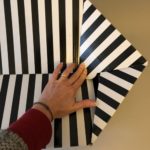
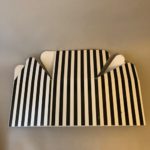
Lay the box flat and notice which flap is smallest, it folds down first. The larger flap locks them both in place.
Start to open the box and turn it upside down. Start on one side and press the small flap down level with the base. This is the finesse part. It takes a bit of pressure but try not to be too heavy handed. Then press the large flap down, until it sit on top of the small flap, then press until they pop through to the inside. The base will fold in a bit, but will come back into place. Repeat on the other side.
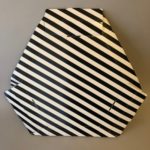
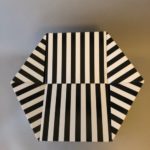
Flip box over and make sure the flaps and the center of the base have all locked together securely.
NOTE: Check to make sure this is the proper size box for the hat you are packing, before you go through the rest of the steps as it is much more efficient to store the boxes flat than assembled. If you picked the wrong size, go to the bottom and follow the directions for collapsing the box.
Attach The Cord Handle
I am sorry about the duct tape to support the holes. I have managed to tear at least one hole in all of my card board hat boxes, with no new pristine ones at hand when writing this post.
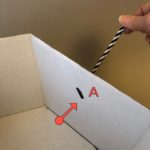
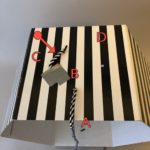
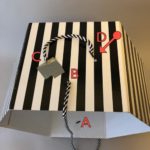

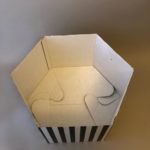
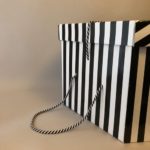
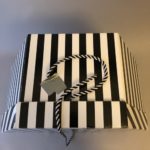
Start on the side with a single hole (A), this is the bottom when the box is standing on its side to be carried. Poke the cord through the hole from the outside to the inside. Flip the metal bit perpendicular to secure it or tie a knot if there is no metal bit.
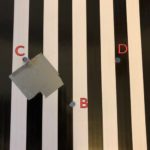
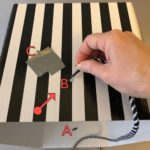
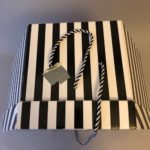
Take the other end of the cord over to the other side which has three holes. Thread the cord from the outside to the inside through the single hole (B) closest to the open edge of the box.
Thread the cord from the inside to the outside of the box in either remaining hole, but I’ve chosen (C). Once on the outside of the box, draw cord through long enough to thread back down into the final hole (D), across from the previous hole (C). Flip the metal bit perpendicular to secure the final end or tie a knot.
Assemble The Lid

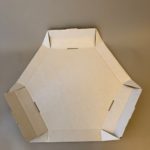


Lay box lid decorative side down. The folding creases are in place to guide you. Fold up the three sides that have pointy flaps on the edges. Fold in the flappy pointy bits at the crease, just a little to follow the shape of the lid.
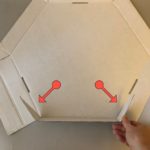
The remaining three flaps are folded twice. The first fold is from the body of the lid, then fold the flap in half in toward the inside of the lid. There is a little notch that will pop into a cut out on the lid body. Often the factory cut cardboard piece is still in the hole, but will easily pop out. Repeat this process for all three sides.
Put It Together
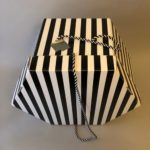
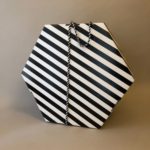
Position the box on the table, pack the contents of the box. Place the lid with the stripes of the lid going in the same direction as the box. It is rare that the stripes line up precisely as I would like. There are two sides where the stripes go in the same direction, I like the side that is smooth and doesn’t have the cut out from the lid flap.
Pull up to cord at the handle carefully to not tear the holes. The cord will secure the lid to the box when you hold the handle. I think this is rather clever. If this doesn’t work, you have possibly threaded the cord handle incorrectly, see images below. You will need to re-thread the cord handle.
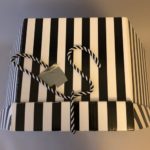
Success – you are good to go

Collapse The Box
Take the lid and the cord handle off the box. Flip the box upside down, the press down of the flap sides until they release the lock from the center base. Pull the largest flap out first, it is a little fiddly. The smaller flap will follow easily.
Caution: A light weight hat in a large cardboard hat box will act like a kite in the wind. If you don’t want to whack your new box & hat on a nearby light post or worse a passerby following a gust of wind, you may need to hold the handle closer to the box and loop a finger through the cord that secures the lid.
Good luck.
Where did you purchase this hat box? I have a large variety of hats and not nearly enough hat boxes and I can’t seem to find any like this online. I only stumble on a bunch of circular boxes.
Hello Skye,
You are very lucky to have lots of hats. I appreciate your challenge of storing them. I’ve gotten the flatpack cardboard hat boxes from a couple of places. If you are just wanting one or two, Baxter, Hart & Abraham are great. However if you are buying in larger quantities check out Hat Boxes Ltd . If you need something more durable, check out my Hattin’ Around Hat Cases you can get a large hat case and pack multiple hats in a single case.
I hope this little blog post makes it easier to put the flatpack boxes together, if that is what you decide on.
Cheers, Leanne
Wow! Thank you so much! They are adorable hat boxes and I will certainly be purchasing some in the future. I’m going to see how they hold up before purchasing any of the nicer ones like yours, but I have definitely have my eye on them.
Thank you again!
Thank you so so very much for providing these instructions!
Susan, I am glad they were helpful. Thank you for commenting. Kind regards, Leanne